@SpringBootApplication의 정체
@Target(ElementType.TYPE)
@Retention(RetentionPolicy.RUNTIME)
@Documented
@Inherited
@SpringBootConfiguration
// Config.xml 의 class 버전인 Config.class를 스캔해서 등록한다
@EnableAutoConfiguration
// context:component-scan
// 반드시 베이스 패키지(MyBootApplication이 있는 패키지)아래에 있어야 bean으로 등록이 된다
@ComponentScan(excludeFilters = { @Filter(type = FilterType.CUSTOM, classes = TypeExcludeFilter.class),
		@Filter(type = FilterType.CUSTOM, classes = AutoConfigurationExcludeFilter.class) })
public @interface SpringBootApplication {
spring.factories의 정체
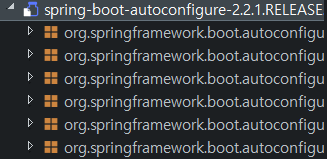

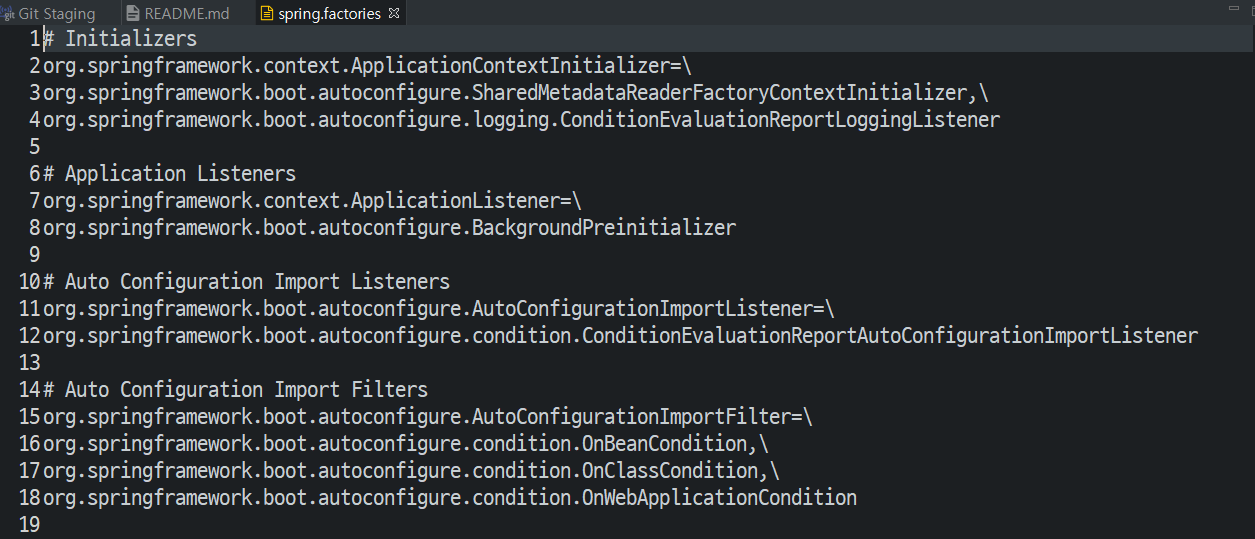
수많은 기본 설정들.
즉 SpringBoot는 이런 기본 설정이 디폴트로 들어있다.
org.springframework.boot.autoconfigure.web.servlet.WebMvcAutoConfiguration
팁: 클래스 이름을 드래그하고 ctrl+shift+t를 누르면 소스를 볼 수 있다.
이 클래스의 내부 코드 중 일부는 다음과 같다.
private boolean singleDispatcherServlet() {
			return this.servletRegistrations.stream().map(ServletRegistrationBean::getServlet)
					.filter(DispatcherServlet.class::isInstance).count() == 1;
		}

@Bean
		@ConditionalOnMissingBean
		public InternalResourceViewResolver defaultViewResolver() {
			InternalResourceViewResolver resolver = new InternalResourceViewResolver();
			resolver.setPrefix(this.mvcProperties.getView().getPrefix());
			resolver.setSuffix(this.mvcProperties.getView().getSuffix());
			return resolver;
		}

@Override
		@SuppressWarnings("deprecation")
		public void configureContentNegotiation(ContentNegotiationConfigurer configurer) {
			WebMvcProperties.Contentnegotiation contentnegotiation = this.mvcProperties.getContentnegotiation();
			configurer.favorPathExtension(contentnegotiation.isFavorPathExtension());
			configurer.favorParameter(contentnegotiation.isFavorParameter());
			if (contentnegotiation.getParameterName() != null) {
				configurer.parameterName(contentnegotiation.getParameterName());
			}
			Map<String, MediaType> mediaTypes = this.mvcProperties.getContentnegotiation().getMediaTypes();
			mediaTypes.forEach(configurer::mediaType);
		}

이런 것들이 다 들어있다...
그래서 작동한다. 이런것들을 따로 설정해주지 않아도
디폴트로 가장 많이 쓰는 설정으로 들어가있기 때문이다.
Thymeleaf
[Spring Boot] 스프링 웹 MVC - Thymeleaf
「스프링부트 개념과 활용」 - 4부 WebMVC
velog.io
JAR에서도 돌아가고 WAR에서도 돌아가는 독립 템플릿 엔진
서블릿 엔진인 JSP는 애초에 단일 파일로 브라우저에서 실행이 불가능하다.
하지만 Thymeleaf는 기본적으로 HTML 파일이기 때문에 브라우저에서 직접 실행이 가능하다.
JAR 배포 방법
<?xml version="1.0" encoding="UTF-8"?>
<project xmlns="http://maven.apache.org/POM/4.0.0"
	xmlns:xsi="http://www.w3.org/2001/XMLSchema-instance"
	xsi:schemaLocation="http://maven.apache.org/POM/4.0.0 https://maven.apache.org/xsd/maven-4.0.0.xsd">
	<modelVersion>4.0.0</modelVersion>
	<parent>
		<groupId>org.springframework.boot</groupId>
		<artifactId>spring-boot-starter-parent</artifactId>
		<version>2.3.8.RELEASE</version>
		<relativePath /> <!-- lookup parent from repository -->
	</parent>
	<groupId>com.first</groupId>
	<artifactId>myboot</artifactId>
	<version>0.0.1-SNAPSHOT</version>
<!-- 여기다가 jar 로 배포한다고 적어줌 -->
	<packaging>jar</packaging>
<!-- 여기다가 jar 로 배포한다고 적어줌 -->
	<name>myboot</name>
	<description>Demo project for Spring Boot</description>
	<properties>
		<java.version>1.8</java.version>
	</properties>
	<dependencies>
	..
	</dependencies>

</project>- oom.xml에 <packaging>jar</packaging><packaging> jar </packaging> 추가해주기
- run → maven build로 jar 만들고
- cmd에서 java -jar xxxxxx.jar로 실행하기
Spring Boot로 jsp 포함한 war 배포할 때…
Maven Repository: org.apache.tomcat.embed » tomcat-embed-jasper
Core Tomcat implementation VersionRepositoryUsagesDate10.0.x10.0.2Central 0 Feb, 202110.0.0Central2Dec, 202010.0.0-M10Central1Nov, 202010.0.0-M9Central 0 Oct, 202010.0.0-M8Central1Sep, 202010.0.0-M7Central 0 Jul, 202010.0.0-M6Central1Jun, 202010.0.0-M5Cent
mvnrepository.com
- 의존성에 jasper embeded를 추가해야 함
- 이유는 내장 톰캣에는 jasper가 없기 때문임. jasper 가 jsp를 처리하는 건데 없음.
- boot는 JSP와 친하지 않다.
- <scope> provided </scope> 추가하기
- 의존성에 jstl 추가해줘야 함
- appplication.properties
// JSP를 BOOT에서 쓰려면 webapp/WEB-INF/무언가폴더/ (이 곳에 jsp를 두고 써야함)
spring.mvc.view.prefix=/WEB-INF/jsp spring.mvc.view.suffix=.jsp
Spring-boot-test의 scope 관련…
<dependency>
    <groupId>org.springframework.boot</groupId>
    <artifactId>spring-boot-starter-test</artifactId>
    <scope>test</scope>
    <!-- <exclusions> -->
    <!-- <exclusion> -->
    <!-- <groupId>org.junit.vintage</groupId> -->
    <!-- <artifactId>junit-vintage-engine</artifactId> -->
    <!-- </exclusion> -->
    <!-- </exclusions> -->
</dependency>
<scope>
기존에 프로젝트는 main과 test가 분리되어있지 않지만 boot는 test 하는 패키지가 따로 있음.
그래서 test하는 패키지에만 test 관련 의존성을 쓰게 <scope>를 주는 것임.
<scope> provided </scope>
boot 프로젝트 의존 성중에서 tomcat, jasper 등에 scope에 provided를 줘야 한다.
실제로 외부환경, 즉 웹 애플리케이션 서버 환경에 대한 의존성은 배포할 때만 주어야하기 때문.
BOOT를 WAR 배포할 때 생기는 서블릿의 정체
Spring Boot 웹 애플리케이션을 WAR로 배포할 때 왜 SpringBootServletInitializer를 상속해야 하는걸까?
Spring Boot로 웹 애플리케이션을 만들고 이를 WAR로 배포할 때에는(Apache Tomcat 같은 Servlet Container에) SpringBootServletInitializer를 상속 하도록 가이드 하고 있다.
medium.com
2개 이상 DataSource 쓰기
doljae/SpringBoot_MyBatis_Multiple_DataSource
Contribute to doljae/SpringBoot_MyBatis_Multiple_DataSource development by creating an account on GitHub.
github.com
'Programming' 카테고리의 다른 글
| Spring 05 (0) | 2021.02.14 |
|---|---|
| Spring(Boot) MVC, JSP, Rest API Controller snippet (0) | 2021.02.12 |
| Spring 03 (0) | 2021.02.07 |
| Spring 02 (0) | 2021.02.07 |
| Spring 01 (0) | 2021.02.07 |